Crock Pot Caramel Dip Recipe
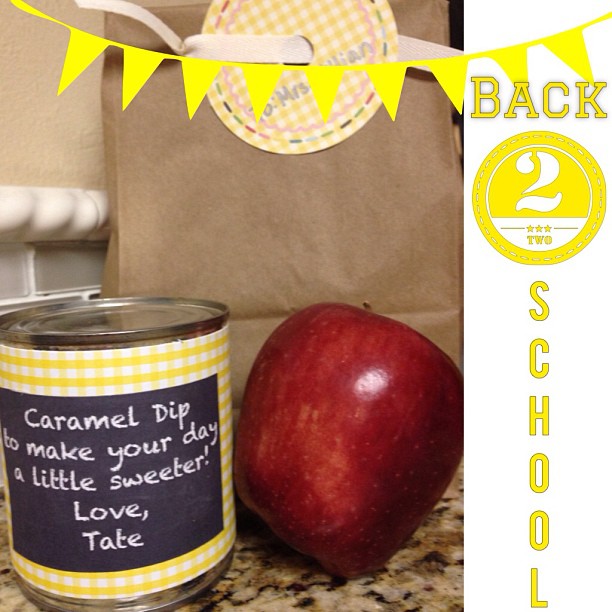
My kids went back to school today <insert angels singing> and while I will miss the little men, I am so glad to have them back in school! I have four boys from first through 8th grade, my younger three all go to the same elementary school. We have always brought the boys’ teachers a small gift for the first day of school, we used to bring a small bouquet of flowers. Last year, though, we changed things up a little and I sent the younger boys to school with homemade caramel dip and an apple. Unfortunately, my oldest is too cool to bring a gift for his teachers. I decided to do the same thing again this year. It is so simple and affordable, but it is so delicious as well!
With over 50 comments between Facebook and Instagram, asking about the recipe, I knew I needed to share the SIMPLE how to! There really isn’t a recipe for the caramel dip. You will need sweetened condensed milk in a can withOUT a pop top lid. The lid needs to be a can opener top to keep it from exploding. You will also need a crock pot and some foil.
Begin by removing the label from your condensed milk can. You can use it as a template for a new label if you are gifting the caramel, yes, it is absolutely that good. Next, line your crock pot with foil to prevent staining your crock pot with rust from the can(s). Place your can(s) on the foil and fill the crock pot with enough water to cover your cans completely. I have a Crock Pot Brand crock pot with 4 temperature settings; 4, 6, 8, and 10 hour settings. I select the 8 hour setting and through some trial and error, found that removing the cans after 6 hours makes the best consistency caramel for my taste. The great thing is, it is really hard to mess it up. If you cook it for too long, your caramel will simply be a little thicker, not long enough, it will be a little thinner. The taste is still there though! The unopened cans will stay fresh in your cabinet or pantry until the expiration date on the can. After it is opened, it needs to be refrigerated, and will only stay fresh for just a few days.
I didn’t take any photos of the process, because, it is truly that simple. Since these cans were gifts to my boys’ teachers, I made a cute chalkboard label in Adobe Illustrator with a note from the boys and stuck it to card stock cut to cover the can. I used glue to hold them in place. I packaged the cans with a fresh apple in a simple brown paper bag with some ribbon and a tag.
Tags : back to school, crock pot, handmade gift, recipe


I can’t wait to try this!! I forwarded the link to a couple of friends/family!
Thank You, Everyday Party!!!
Thank you! I am sure you will LOVE it!
My crockpot just has a high and low setting, which one would be best?
Ashley,
Hmmm, I wasn’t entirely sure, so I did some research. It looks like the general consensus it to cook it on low for 8 hours…I like mine a little more creamy than the images I saw for the 8 hour cook time, so I would likely pull it out after 6-7 hours.
I hope you love it!