• Home
  • About
  • Shop
    • SVG’s
      • Mother’s Day
      • Summer
      • Winter
      • Spring
      • Father’s Day
      • Sports
      • St. Patrick’s Day
      • Easter
      • Home
      • Wedding
      • School
      • Fall
      • Halloween
      • Kids
      • Thanksgiving
      • Christmas
      • New Year’s
      • Valentine’s Day
      • 4th of July – Patriotic
    • Holiday
      • Valentine’s Day
      • St. Patrick’s Day
      • Easter
      • Halloween
      • Christmas
      • Hanukkah
      • New Year’s
    • Sublimation
      • Spring
    • Party Packages
    • Magazine
  • DIY
  • Recipe
  • Freebies
  • Contact
  • Submissions
  • Cart
  • Privacy Policy and Disclosures

Everyday Party Magazine

  • About
  • Cart
  • Checkout
  • Contact
  • DIY
  • Freebies
  • Full Width
    • Home
  • Instagram Inspiration
  • Magazine
  • My Account
  • Privacy Policy and Disclosures
  • Recipes
  • Shop
  • Submissions
April 3, 2015

Moss Banner DIY

Moss Banner DIY

Moss Banner DIY by A Sweet Touch by Rachelle Grace on Everyday Party Magazine

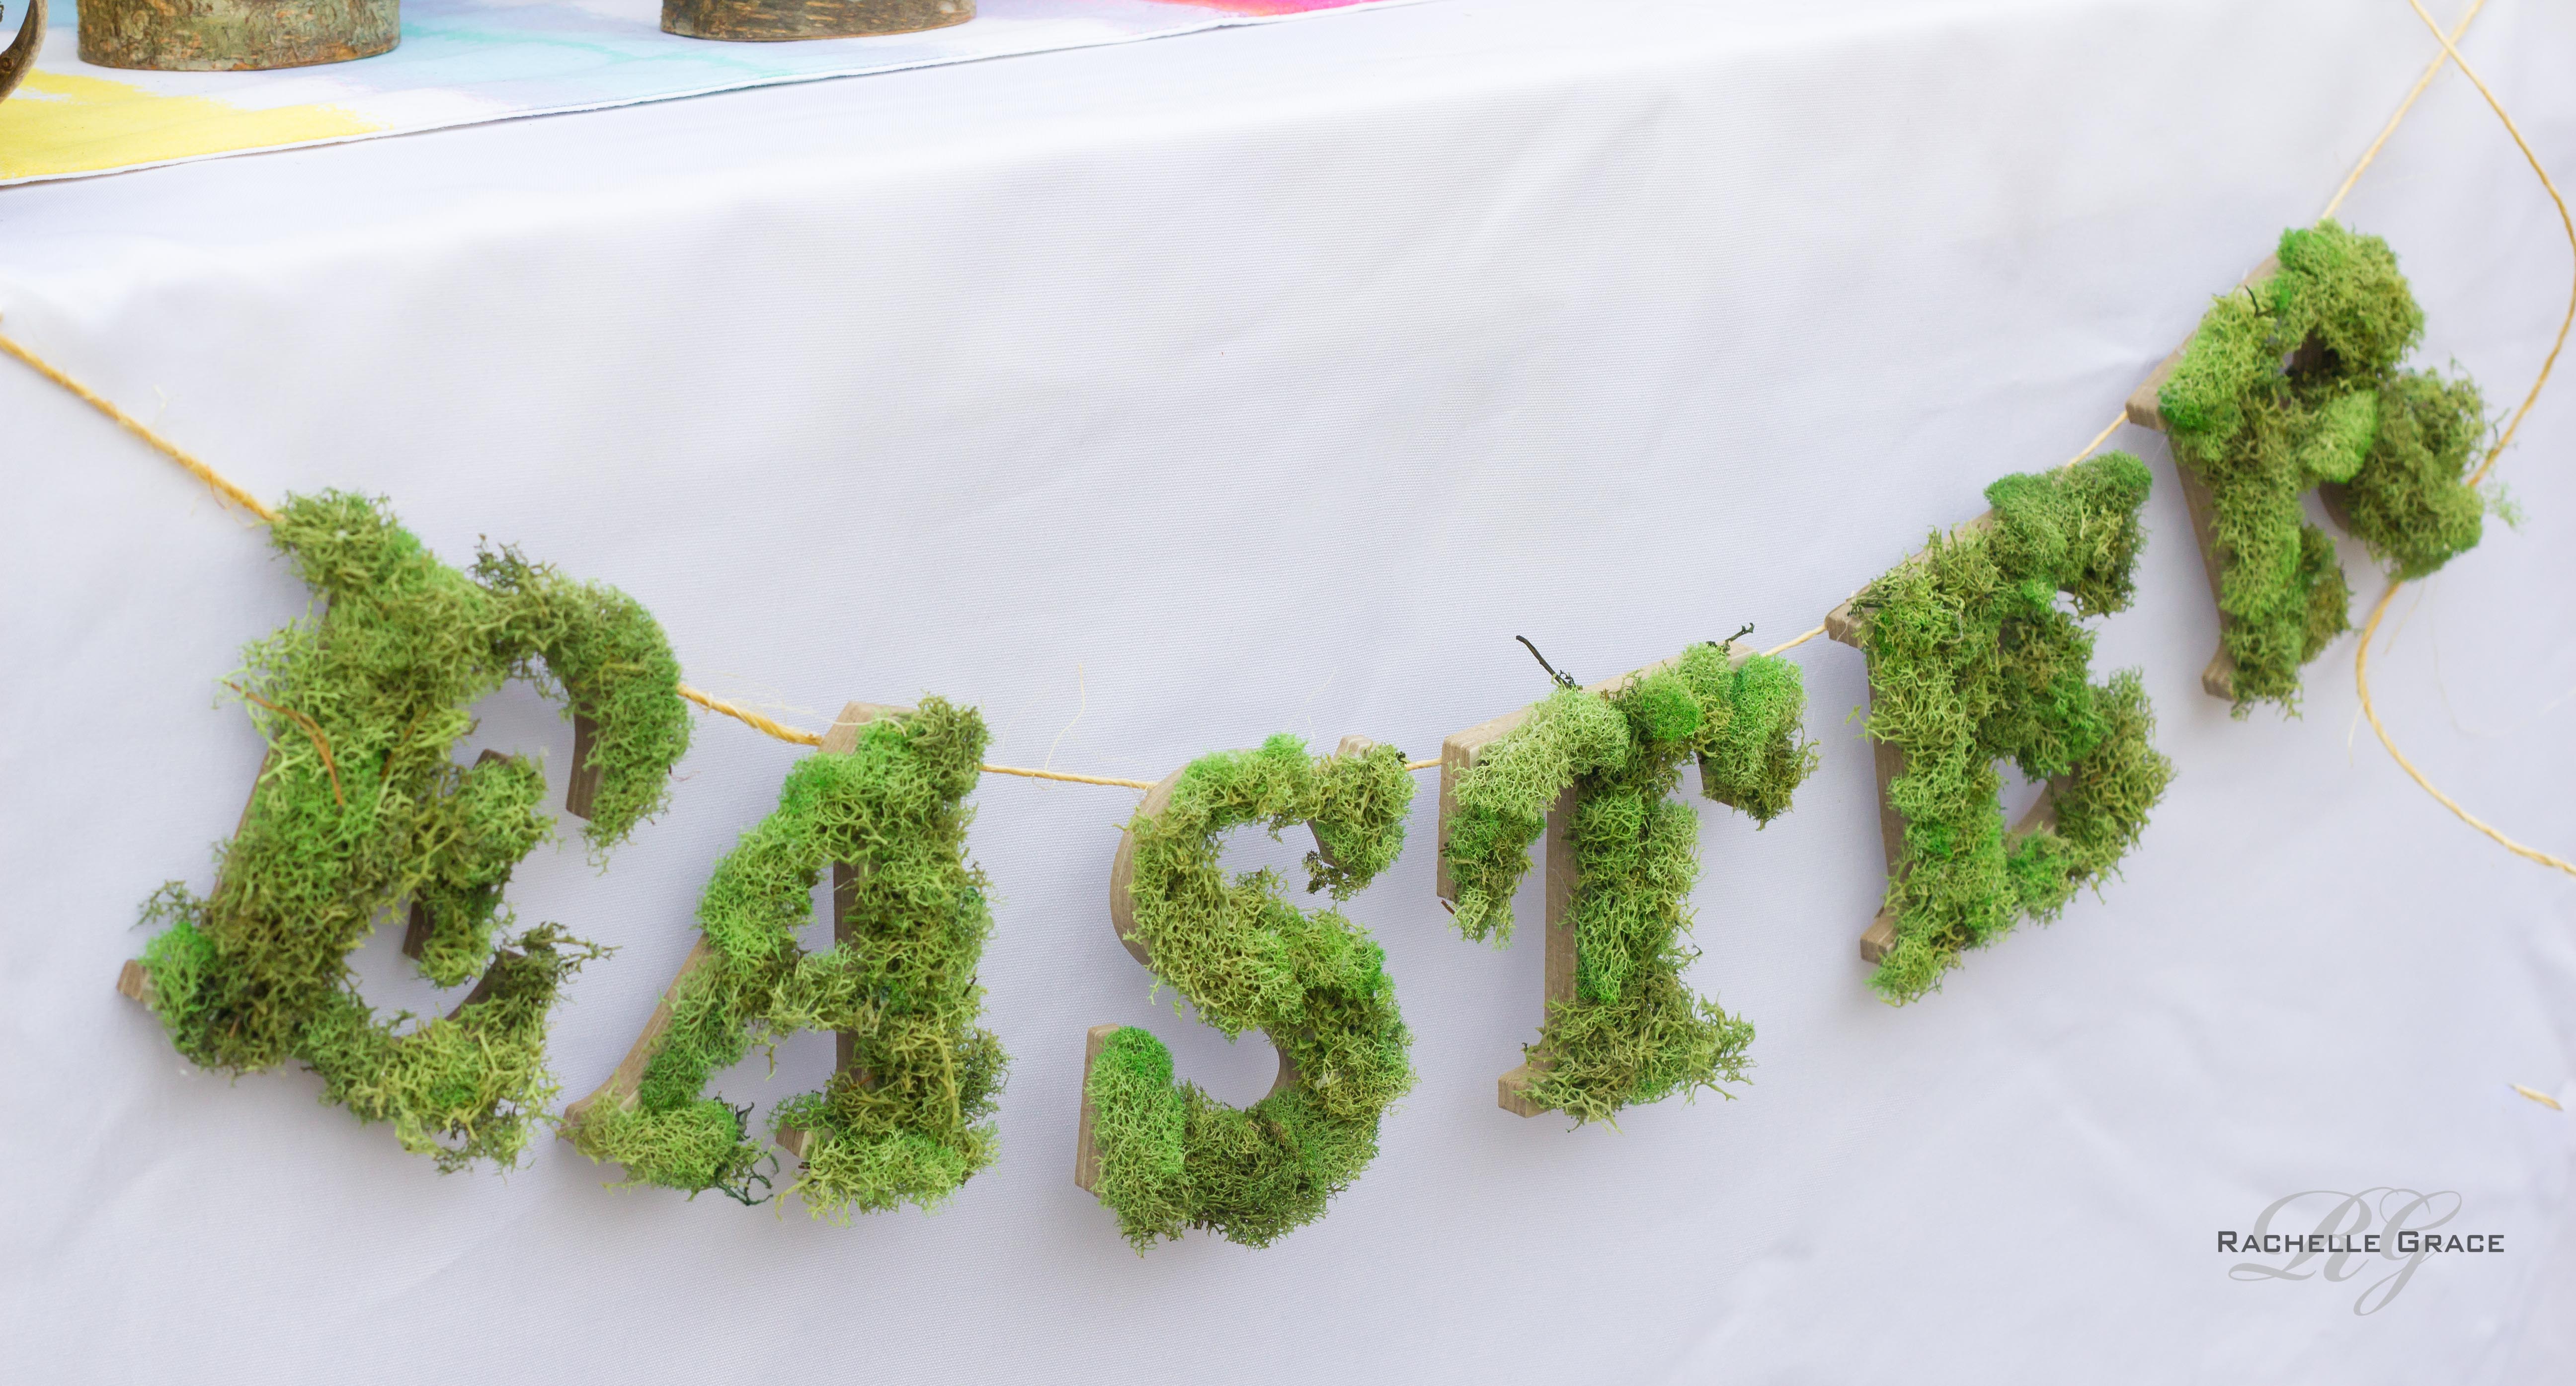
Moss Banner DIY by A Sweet Touch by Rachelle Grace. I shared this gorgeous Easter Egg Decorating Party on EPM yesterday, and I thought the moss banner DIY deserved it’s very  own post! Think of the possibilities for this..bridal shower, woodland baby shower, weddings, birthdays…ENDLESS possibilities! 

From A Sweet Touch by Rachelle Grace:

The banner used for the party would work for any outdoor theme such as a camping party, ladybug, fairy or woodland tea party.  You need a few supplies to make one yourself. All supplies are available at your local craft store.

Bag of Moss

Chip Board Letters (3″ or larger)

Twine or strong cord with little to no stretch

Glue Gun

Carefully apply glue onto each letter. Add small sections of the moss onto the letters filling in any gaps.  Once all letters are completely covered in moss lay the letters out in a straight line.  Measure the desired length of twine ensuring you have enough for hanging the banner.  Apply a strip of hot glue to the back of each letter and adhere the twine to the letter.  It is important to glue the twine across the full width of the letter to help the banner drape properly.

Be sure to check out A Sweet Touch by Rachelle Grace on Facebook and her blog!

Tags : A Sweet Touch by Rachelle Grace, DIY, Easter, Woodland

In Blog, DIY
Previous Sock Bunny DIY
Next DIY Easter Bunny Milk Jar Favor

Related posts

Name Plaque

Back to School Teacher Gift Idea

Everyday Party Magazine Picnic Party Favors #Xyron #DIY #Picnic #Gingham

Picnic Party Favors

Linen Napkin Cotton Stems

Simple Thanksgiving Napkin DIY with Xyron...

Primary Sidebar

About

You could say my blogging journey is a little bit Erin Brockovich, and a whole lot creative mom...
read more

Be the first to know, sign up for our newsletter!

Thank you for subscribing!

  • About
  • Privacy Policy and Disclosures
  • Submissions
  • Contact

We are a participant in the Amazon Services LLC Associates Program, an affiliate advertising program designed to provide a means for us to earn fees by linking to Amazon.com and affiliated sites.

Copyright © 2025 Everyday Party Magazine · Theme by SheShoppes