Turkey Crayon Holder DIY
When I made this cute little Turkey Crayon Holder for my little men last year, I knew I wanted to share a DIY. Since, EPM was just in the planning stages, I had to wait to share the DIY until this year. My boys were equally as excited to “help” me make this one as they were to help with the ones we made last year!
For this DIY, you will need to be familiar with power tools. I LOVE using our tools.
You will need:
* Saw I used our well used and loved Ryobi “chop saw” or compound miter saw. You could use any saw you are comfortable with though, honestly
* Drill
* Firewood log for the turkey body
* Scrap wood 1/2″ to 1″ thick for the turkey head
* Sand paper or sander
* Optional: paper and pencil to sketch the turkey head, Crayola Crayons (or Cake Pops), and Thanksgiving coloring pages
The first step is finding a good log to use. I cut a 3″-4″ disc off of one from our firewood pile. I cut it with the miter saw. I actually cut it twice to have two “fresh” sides. This is the body of the turkey where you will drill for crayon holes, so make sure it isn’t too rotten or knotty. When you have your disc cut, cut the disc in half so you have two half circles. You can make two turkeys, or you can cut it less evenly, and have a taller turkey. Either way works fine, as long as you have a flat bottom on your log.
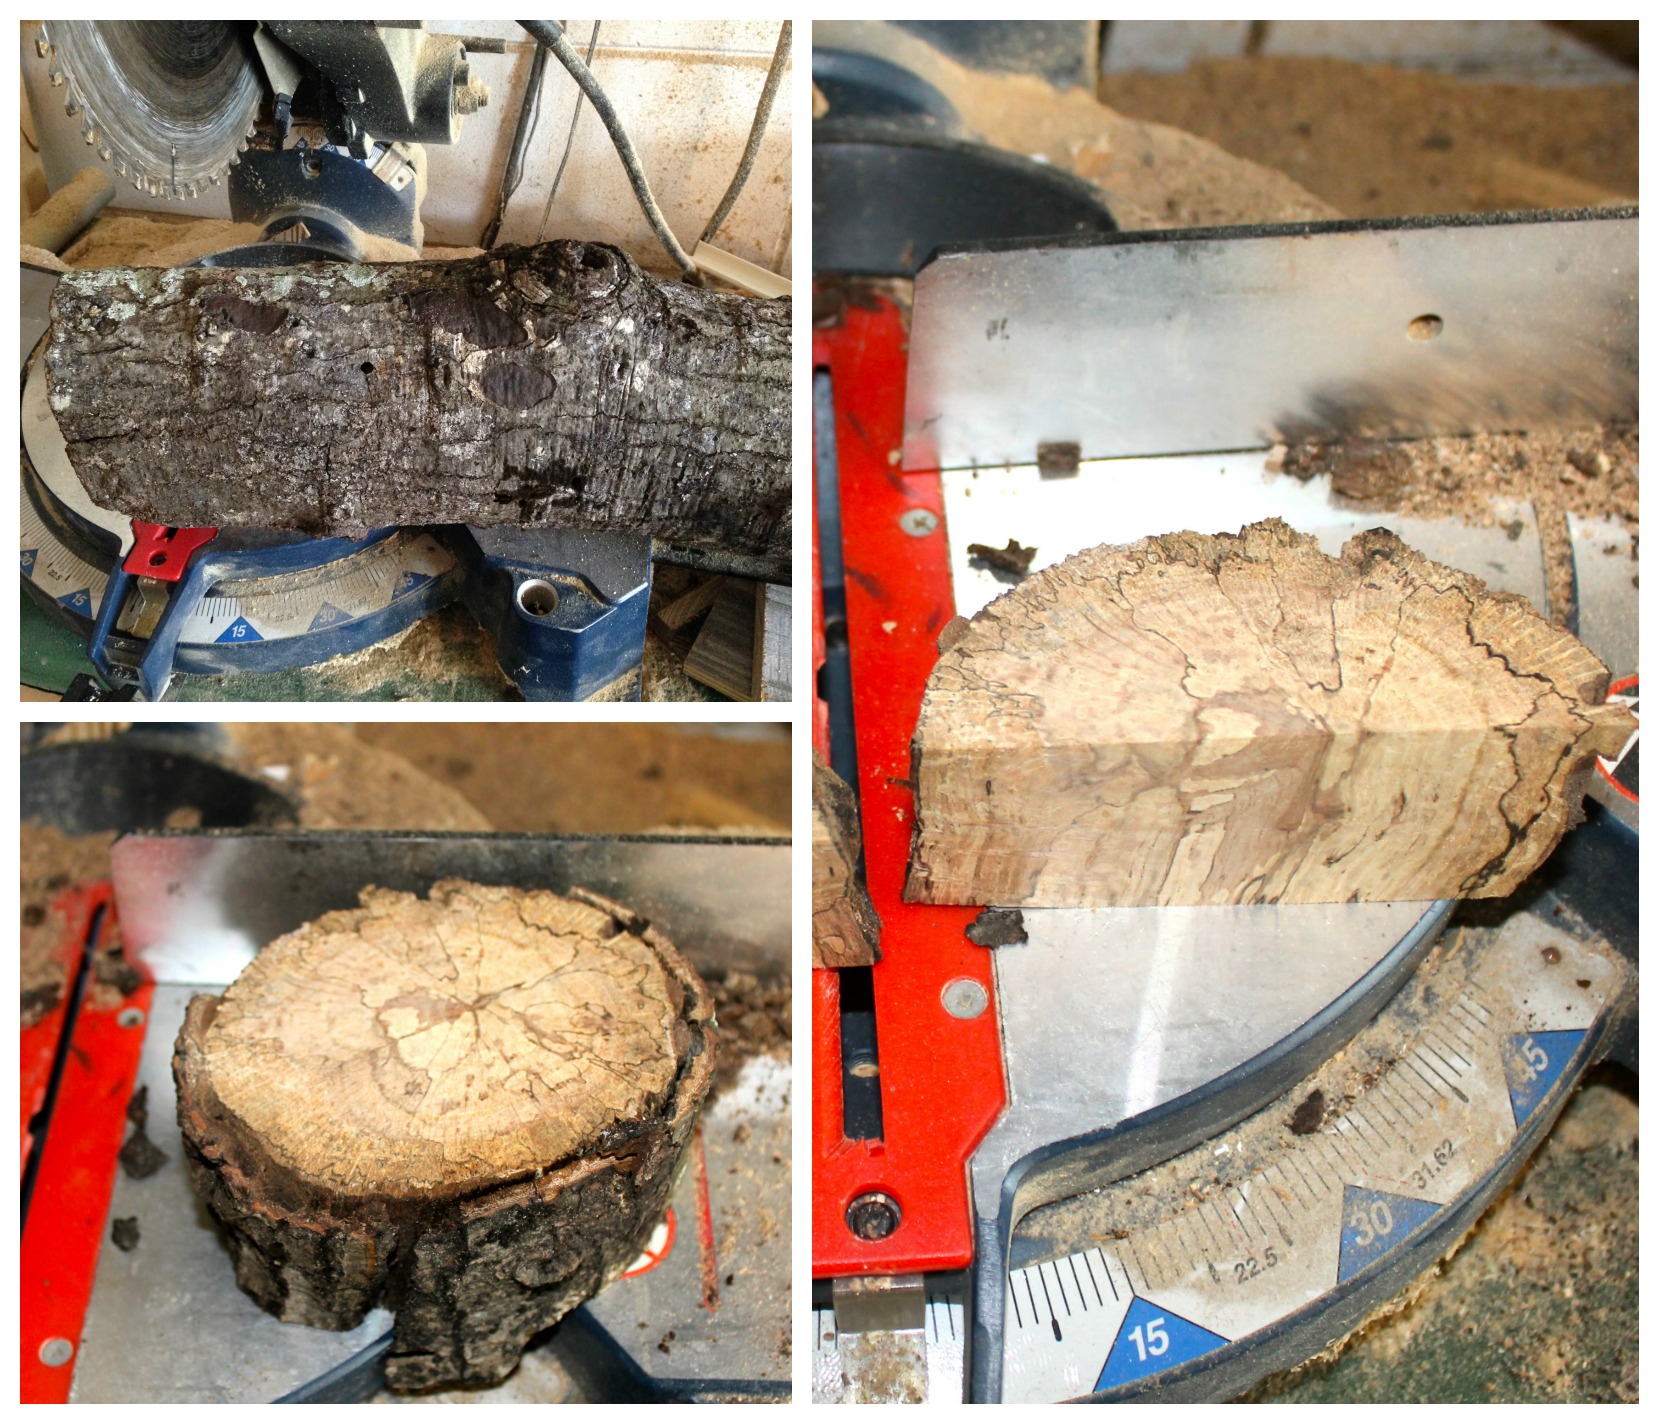
Firewood log on the miter saw
Now you are ready to cut out the turkey’s head. I recently scored a scroll saw on Craigslist for just $15! I was so excited to finally have a chance to use it yesterday when I cut out the turkey head. We used a jig saw last year, and while it was effective, I feel like I was able to make the turkey gobble a little more creative this year. This part took me a little while because the kids were actively “helping” me, and I was new to using a scroll saw…and I may have had to put the blade back on track once… After I cut the head out, I sanded it lightly with a sheet of sand paper we had in the garage, I don’t know what grit it was, I just wanted to smooth the edges some. The scroll saw cut very smoothly, so I didn’t need to sand it much. After I sanded the head, I placed it next to the firewood log body, and decided to cut the neck down some. When I was happy with the neck, I used Gorilla Glue and a clamp to hold it for about an hour or so. You could pre-drill a tiny hole through the body and into the neck if you wanted to, but since I am drilling crayon holes in the top, I was afraid of over drilling and causing the log to split. We used Gorilla Glue last year and it worked like a champ!
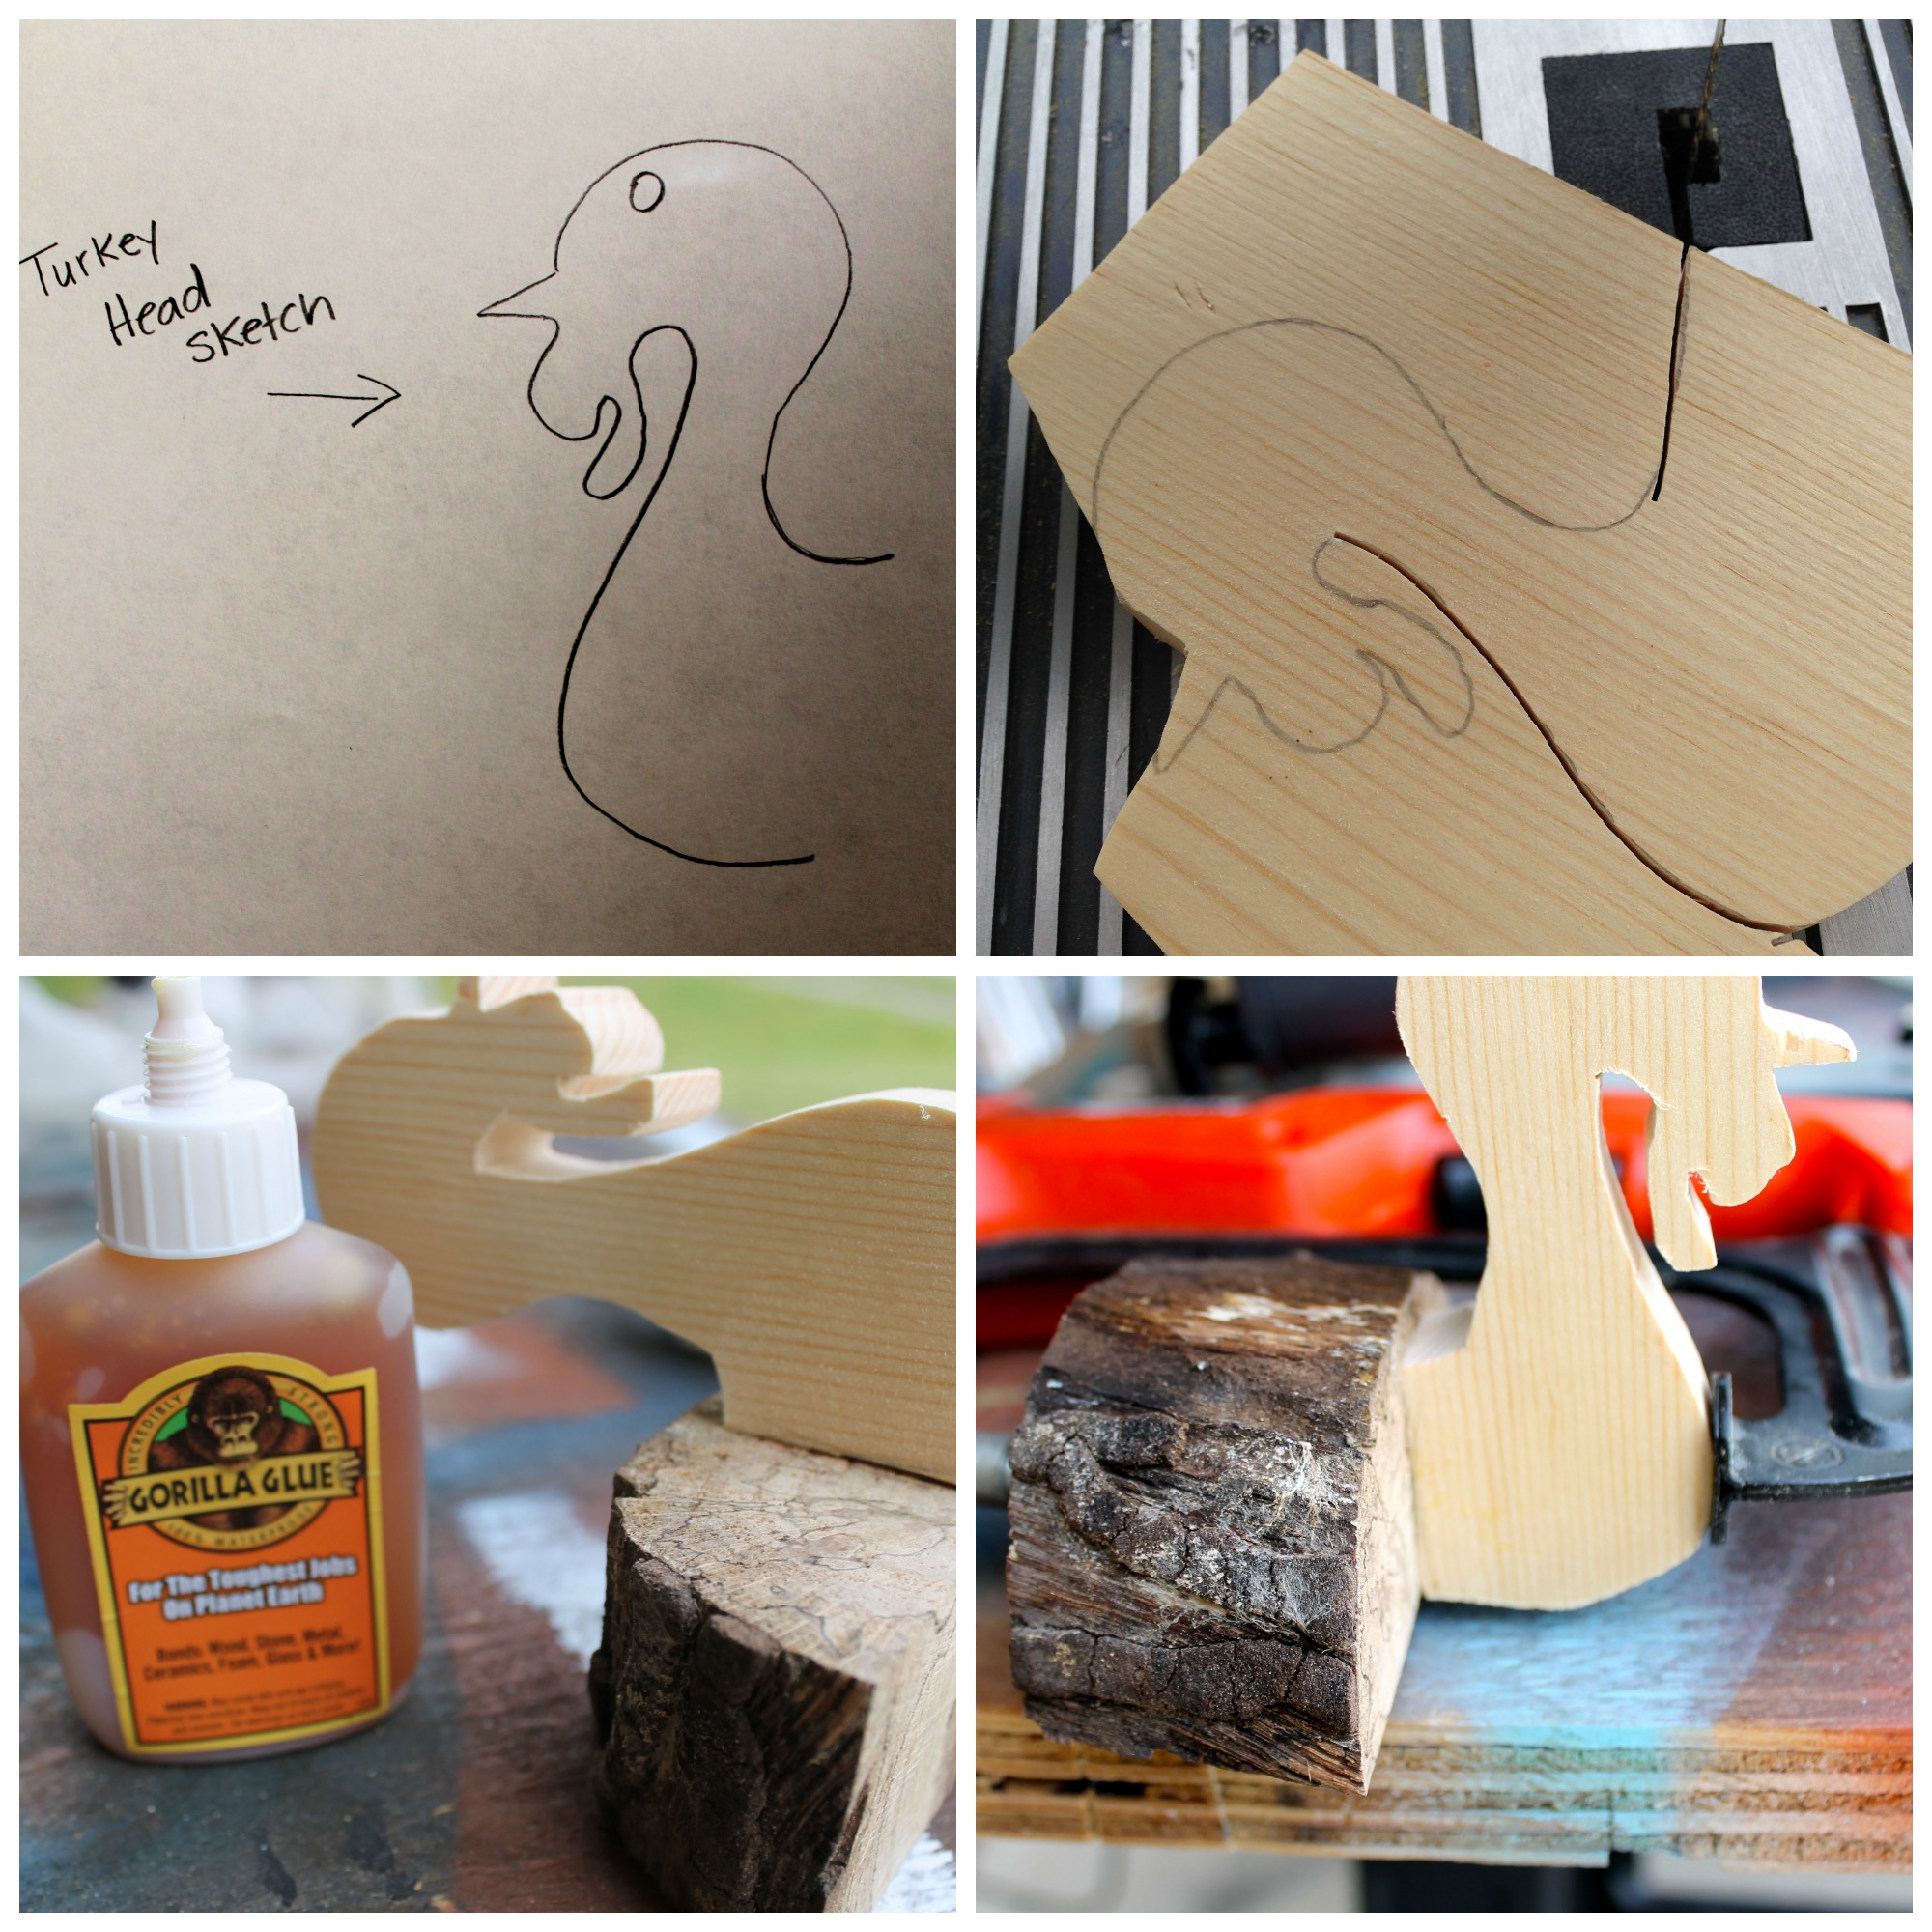
Turkey Head sketch, cutting, and gluing
Once your turkey head is glued on securely, you can drill your crayon holes. I let the boys drill the holes. There is really no right or wrong way to do this part. I would suggest not over drilling it. We put 7 holes in this one, but it could have a few more. Crayola brand crayons fit perfectly in a 3/4″ hole. I am not sure about other brands or cake pop sticks though. I surprised the boys with a new 8 count box of Crayolas from Target for this project. Who does’t love new crayons?!
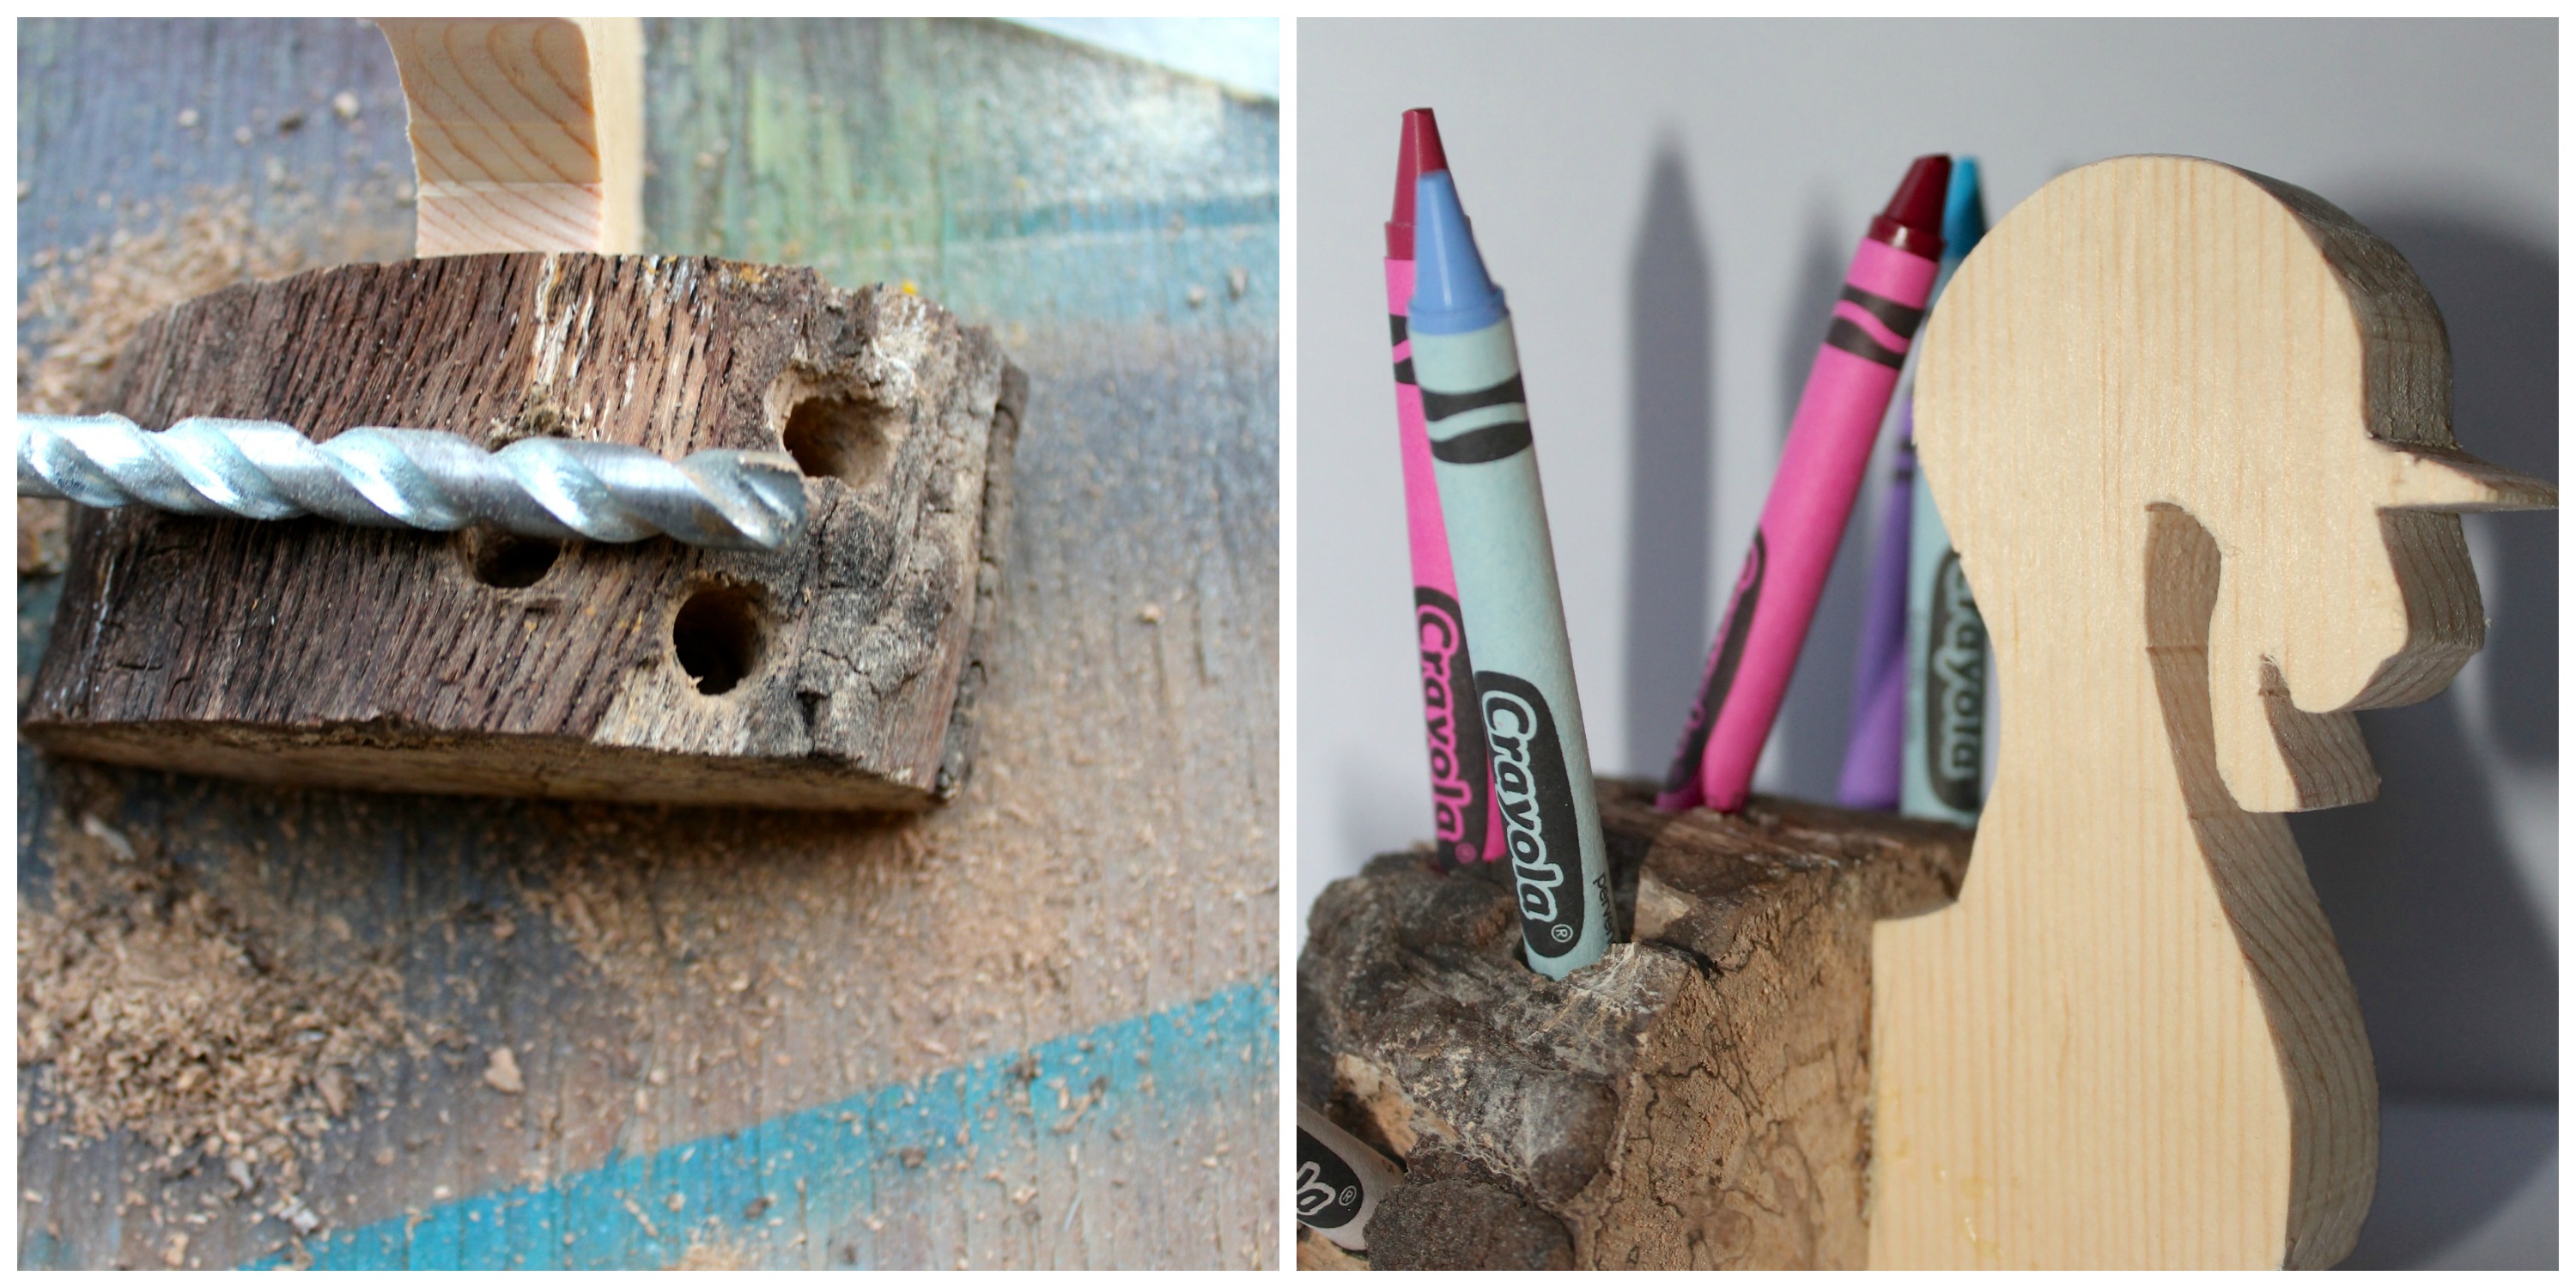
- Drill bit holes and final product
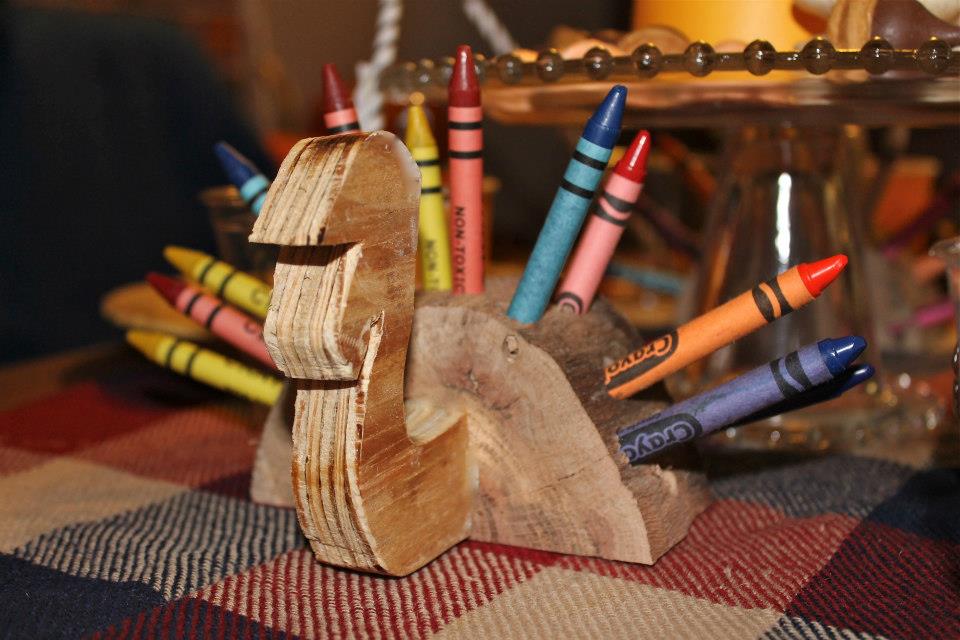
Last year’s turkey on the kids table
From start to finish, this project took about 2 hours. But, I had two hours of help from the under 10 crowd in my house too. I hope you are inspired to make one for your Thanksgiving tables too!


This is so cute!!!
Thanks!! xoxo